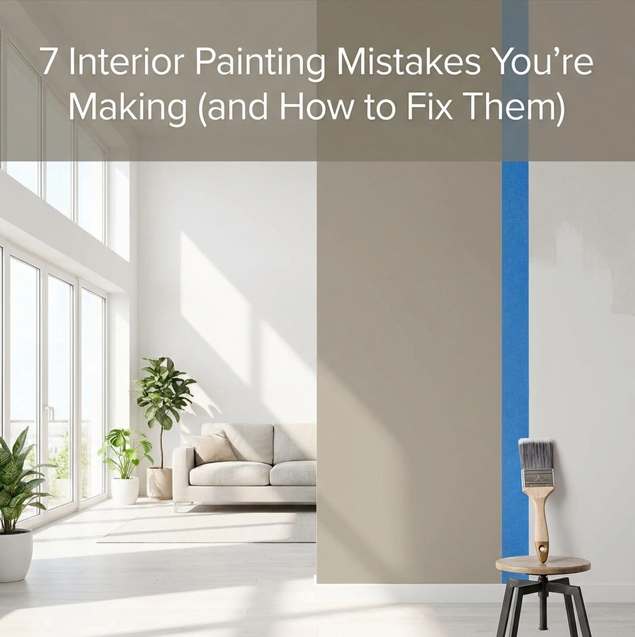
You have spent hours picking out the perfect paint color for your living room. You have watched a few YouTube tutorials, gathered your supplies, and blocked off an entire weekend. But when Monday morning rolls around, something feels off. The finish looks uneven, there are drips running down the wall, and those crisp edges you envisioned? Not quite what you had in mind.
Here is the truth, interior painting looks simple, but the details make all the difference between a DIY disaster and a stunning transformation. Whether you are tackling a single accent wall or refreshing every room in your home, avoiding these seven common mistakes will save you time, money, and a whole lot of frustration.
Mistake #1: Skipping Surface Preparation
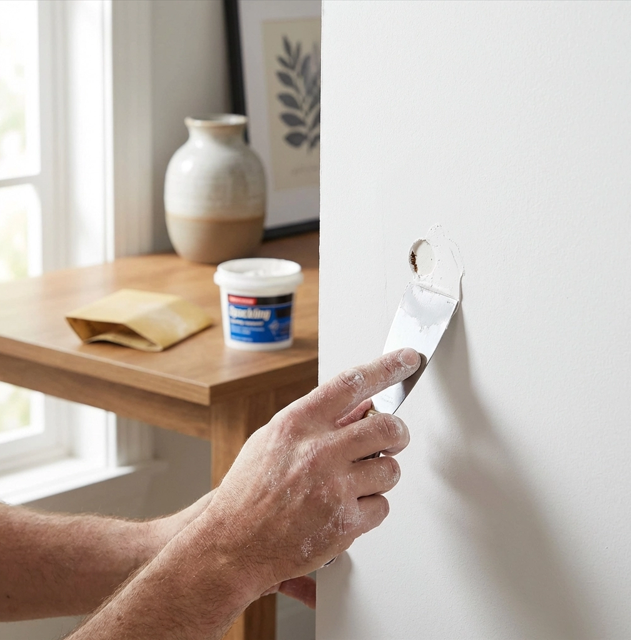
This is the mistake that separates amateur paint jobs from professional results. We get it, you are excited to see that new color on your walls. But rushing past the prep work is the fastest route to peeling, bubbling, and premature wear.
Why It Matters: Paint needs a clean, smooth surface to adhere properly. Dust, grease, cobwebs, and imperfections act as barriers between your wall and that beautiful finish you are trying to achieve.
The Fix:
Clean your walls thoroughly with a damp cloth and mild detergent solution
Fill holes and cracks with spackling compound, then sand smooth once dry
Caulk gaps along trim and around windows
Remove outlet covers and switch plates before you even open a paint can
Address any drywall repair needs before painting
Yes, this prep work often takes longer than the actual painting. But trust us: it is the foundation of every flawless finish we deliver for our clients.
Mistake #2: Overloading Your Brush or Roller
More paint equals better coverage, right? Unfortunately, that is not how it works. When you load too much paint onto your brush or roller, you are setting yourself up for drips, streaks, and an uneven texture that no amount of touch-ups can fix.
Why It Matters: Excess paint does not spread evenly. It pools in corners, runs down walls, and leaves visible brush marks that harden into permanent imperfections.
The Fix:
Dip your brush only about halfway up the bristles
Tap off excess paint on the edge of your container: never wipe it
Load rollers so they are wet but not dripping
Apply paint with gentle, consistent pressure
Work in manageable sections rather than trying to cover too much at once
Think of it this way: multiple thin, even coats will always outperform one thick, muddy application.
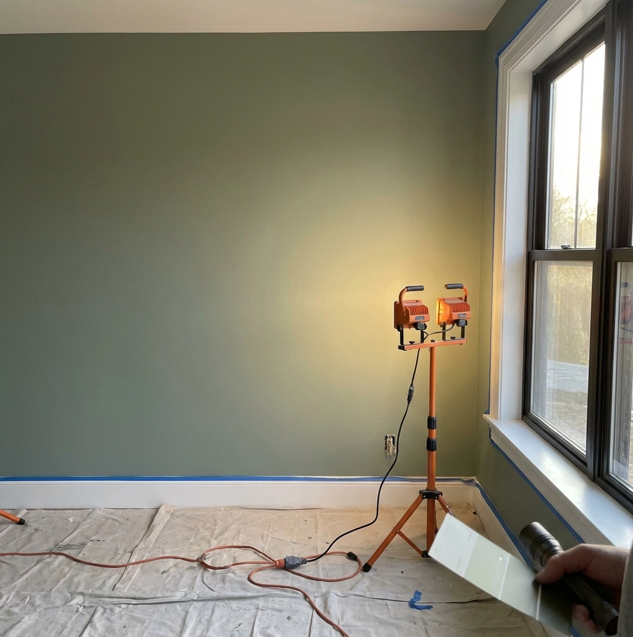
Mistake #3: Painting in Poor Lighting
Have you ever finished painting a room, stepped back feeling accomplished, only to notice missed spots and uneven coverage the next morning? You are not alone. Poor lighting is one of the sneakiest saboteurs of a quality paint job.
Why It Matters: Natural light shifts throughout the day, and standard overhead fixtures create shadows that hide imperfections. What looks flawless at noon might reveal streaks and thin spots by sunset.
The Fix:
Set up portable work lights positioned at different angles to eliminate shadows
Inspect your work from multiple angles as you go
Keep a small brush handy for immediate touch-ups
Do a final inspection in daylight before calling the job complete
Professional painters know that lighting is everything. We always ensure proper illumination when working on interior house painting projects: it is the only way to guarantee consistent, thorough coverage.

Mistake #4: Not Using Painter's Tape
We have heard it before: "I have a steady hand: I do not need tape." And while we admire the confidence, painter's tape exists for a reason. Skipping it almost always results in paint bleeding onto trim, ceilings, and areas you wanted to keep pristine.
Why It Matters: Even the most experienced painters use tape to create crisp, professional edges. Freehand cutting-in is a skill that takes years to master, and your weekend project is not the time to test your limits.
The Fix:
Apply painter's tape along all edges, corners, trim, and door and window frames
Press the tape firmly to prevent paint from seeping underneath
Remove tape at a 45-degree angle while the final coat is still slightly tacky
Take your time with taping: rushing this step defeats the purpose
This step is especially critical in spaces like kitchens and bathrooms, where walls meet cabinets, tiles, and fixtures.
Mistake #5: Overworking the Paint
You notice a small imperfection in an area you just painted. Your instinct tells you to go back and brush over it: just a quick fix. But that quick fix often creates a bigger problem.
Why It Matters: Once paint starts to dry, continuing to brush or roll over it causes visible ridges, marks, and an uneven texture. Modern latex paints begin setting up faster than you might expect, and overworking disrupts the smooth finish you are after.
The Fix:
Work in small sections, approximately three feet at a time
Apply your paint and move on: resist the urge to keep brushing
If you notice a flaw after the paint has started drying, let it cure completely and address it with the next coat
Accept that some minor imperfections will disappear once the final coat is applied
This requires patience, but the results speak for themselves. A hands-off approach after application leads to that smooth, professional finish every homeowner wants.
Mistake #6: Rushing the Drying Process Between Coats
You have finished your first coat and the walls look great. Why wait? You have momentum: might as well knock out that second coat now. This temptation has ruined more paint jobs than we can count.
Why It Matters: Applying a second coat before the first one has fully cured results in smudges, smears, roller marks, and an uneven finish. The wet paint from the first coat mixes with the second, creating a muddy mess that compromises both adhesion and appearance.
The Fix:
Follow the manufacturer's recommended drying times: typically two to four hours for latex paint
Consider environmental factors; humidity and temperature affect drying times
When in doubt, wait longer rather than rushing
Use a fan or open windows to improve air circulation, but avoid pointing fans directly at wet walls
We understand you want to finish your bedroom painting project before the weekend ends. But patience between coats is non-negotiable for a quality result.
Mistake #7: Inconsistent Paint Coverage
Thin spots. Visible roller marks. Uneven color that looks patchy even after drying. These issues all stem from inconsistent paint application: and they are more common than you might think.
Why It Matters: Stretching paint too far, improper roller loading, or rushing through the job creates coverage problems that become more obvious as the paint dries. This is especially noticeable when making dramatic color changes or covering dark walls with lighter shades.
The Fix:
Follow the manufacturer's coverage guidelines on the paint can
Load your roller consistently and apply even pressure throughout
Do not stretch paint too thin trying to make one can cover more area
For significant color changes, use a tinted primer first, followed by two topcoats
Maintain a wet edge to avoid lap marks where sections overlap
Quality paint and proper application techniques work together. Cutting corners on either leads to disappointing results.
When to Call in the Professionals
Tackling interior painting yourself can be rewarding: when everything goes according to plan. But when you factor in the time spent on preparation, the cost of quality materials, and the frustration of correcting mistakes, hiring professionals often makes more sense than you might initially think.
Our team at 360° Painting of Greater Nashville brings meticulous attention to detail, premium materials, and years of experience to every project. We handle the prep work, protect your furnishings, and deliver flawless results: while you spend your weekend doing something you actually enjoy.
Ready to transform your home without the hassle? Whether you need help with a single room or want to refresh your entire interior, we are here to help. Get your free estimate and discover why homeowners trust us for their painting projects.